HD2615, HD2613, HD2611
|
|
|
- Nilüfer Kizil
- 6 yıl önce
- İzleme sayısı:
Transkript


1 HD2615, HD2613, HD2611
2 2
3 3 1
4 4
5 ENGLISH 6 ESPAÑOL 10 ITALIANO 14 PORTUGUÊS 18 ΕΛΛΗΝΙΚΑ 22 TÜRKÇE 27 HD2615, HD2613, HD2611
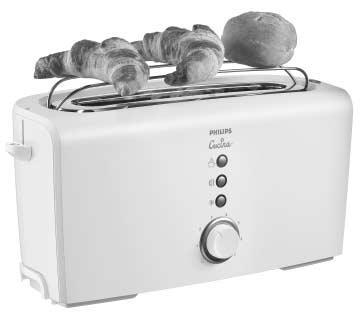
6 6 ENGLISH General description (fig.1) A Crumb tray B Stop button C Toasting lever D Warming rack lever E Warming button (HD2613, HD2615) Warming setting (HD2611) F Reheat button (HD2613) Reheat setting (HD2611, HD2615) G Defrost button (HD2613, HD2615) Defrost setting (HD2611) H One-side toasting button (HD2615) I Browning control Important Read these instructions for use carefully before using the appliance and save them for future reference. Check if the voltage indicated on the bottom of the appliance corresponds to the local mains voltage before you connect the appliance. Only connect the appliance to an earthed wall socket. If the mains cord is damaged, it must be replaced by Philips, a service centre authorised by Philips or similarly qualified persons in order to avoid a hazard. Do not immerse the appliance or the mains cord in water or other liquids. Always unplug the appliance after use. Keep the appliance out of the reach of children. Do not let the mains cord hang over the edge of the table or worktop and keep the cord away from hot surfaces. Do not let the appliance operate unattended. Do not operate it under or near curtains or other flammable materials or under wall cabinets, as bread may burn. Avoid touching the metal parts of the toaster as they become very hot during toasting. Only touch the controls and lift the appliance by its plastic body. The toaster is intended for household use only and may only be used indoors. To avoid the risk of fire, frequently remove crumbs from the crumb tray. Make sure the crumb tray is correctly placed. Immediately unplug the toaster if fire or smoke is observed. If a slice of bread gets stuck inside the toaster, unplug the appliance and allow it to cool down before trying to remove the bread. Do not use a knife or a sharp tool, as these may cause damage to the heating elements. The appliance is only meant for toasting bread. Do not put any other ingredients in the appliance, as this may lead to a hazardous situation. Oversized foods and metal foil packages must not be inserted into the toaster, as this may cause fire or electric shock. Do not place the dust cover (some types only) on top of the toaster when the appliance is switched on or when it is still hot, as this could lead to damage. Do not place the toaster on a hot surface. The warming rack is only meant for warming up rolls or croissants. Do not put any other ingredients on the warming rack, as this may lead to a hazardous situation.
7 ENGLISH 7 Before first use Remove any stickers and wipe the body of the toaster with a damp cloth. Before using the appliance for the first time, we advise you to let the appliance complete a few toasting cycles without slices of bread on the highest browning setting in a properly ventilated room. This will burn off any dust that may have accumulated on the heating elements and will prevent unpleasant smells when toasting bread. Using the appliance 1 Put the appliance on a stable and flat surface, away from curtains and other combustible materials. Put the plug in the wall socket. You can adjust the length of the cord by winding part of it round the brackets in the base of the appliance (fig. 2). Toasting bread Never let the toaster operate unattended. 1 Put one or two slices of bread in the toaster (fig. 3). 2 Select the desired browning setting (fig. 4). Select a low setting (1-2) for lightly toasted bread and a high setting for a dark browning result (5-7). 3 Push the toasting lever down to switch the appliance on (fig. 5). - The stop button lights up. - The toasting lever will only stay down if the appliance has been connected to the mains. The metal parts of the toaster will get hot during toasting. Be careful not to touch them. 4 When the toast is ready, it pops up and the toaster switches off. The toaster will switch off automatically.you can stop the toasting process and pop the bread up at any time by pressing the STOP button on top of the toaster (fig. 6). To remove smaller items, you can move the toasting lever upwards a little further. If bread gets stuck inside the toaster, remove the plug from the wall socket, let the appliance cool down completely and carefully remove the bread from the toaster. Do not use a knife or another sharp metal tool to do this and do not touch the metal internal parts of the toaster. Toasting frozen bread Type HD2611: 1 Follow the instructions in the 'Toasting bread' section, but turn the browning control to setting and then push the toasting lever down (fig. 7). Types HD2613 and HD2615: 2 Follow the instructions in the 'Toasting bread' section, but push the toasting lever down and then press the defrost button (fig. 8). The button lights up. Note: toasting frozen bread will take longer to toast than defrosted bread.
8 8 ENGLISH Reheating toasted bread Types HD2611 and HD2615: 1 Follow the instructions in the 'Toasting bread' section, but turn the browning control to setting ç and then push the toasting lever down (fig. 9). Type HD2613: 2 Follow the instructions in the 'Toasting bread' section, but push the toasting lever down and then press the reheat button ç (fig. 10). The button lights up Toasting one side only (type HD2615 only) Ideal for toasting bagels and baguettes. 1 Half the bagel or baguette lengthwise and shorten the baguette to a length of max. 13 cm. 2 Put the bread in the toaster with the side to be toasted facing the front of the toaster (fig. 11). 3 Follow the instructions in the 'Toasting bread' section, but push the toasting lever down and then press the one-side toasting button Ù (fig. 12). The button lights up. Before every new one-side toasting cycle, you have to push the toasting lever down and press the one-side toasting button Ù again. You can also use this function in combination with the setting for toasting frozen bread. Heating up rolls and croissants 1 Push the warming rack lever down to unfold the warming rack (fig. 13). Never put the rolls to be heated up directly on top of the toaster without having unfolded the warming rack to avoid damaging the toaster. 2 Put the rolls or croissants on top of the warming rack. Do not heat up more than 2 items at a time. Types HD2613 and HD2615: 3 Push the toasting lever down and press the warming button Û.The button lights up (fig. 14). If you want to heat the rolls or croissants on both sides, turn them after the toaster has shut itself off and switch the toaster on again by pushing the toasting lever down and then pressing the warming button Û. Before every new warming cycle, you have to push the toasting lever down and press the warming button again. Type HD2611: 4 Turn the browning control to setting Û and push the toasting lever down (fig. 15). If you want to heat the rolls or croissants on both sides, turn them after the toaster has shut itself off. Leave the browning control set to the warming setting Û and switch the toaster on again by pushing the toasting lever down.
9 ENGLISH 9 Cleaning 1 Unplug the appliance. 2 Let the appliance cool down. 3 Clean the appliance with a damp cloth. Do not use abrasive cleaning agents. Never immerse the appliance in water. 4 Remove crumbs from the appliance by sliding the crumb tray out of the appliance (fig. 16). Do not hold the appliance upside down and do not shake it to remove the crumbs. Guarantee & service If you need information or if you have a problem, please visit the Philips website at or contact the Philips Customer Care Centre in your country (you will find its phone number in the worldwide guarantee leaflet). If there is no Customer Care Centre in your country, turn to your local Philips dealer or contact the Service Department of Philips Domestic Appliances and Personal Care BV. Troubleshooting If you are unable to solve the problem by means of this troubleshooting guide, contact the Customer Care Centre in your country (see chapter 'Guarantee & service'). Problem 1.The toaster does not work. 2. Bread gets stuck in the appliance. 3.The toast is too dark/too light. 4. Smoke comes out of the toaster. 5.The mains cord is damaged. 6. One side of the bread has not been toasted. 7. I cannot change the browning level when I use the warming function. 8. Only one side of my roll or croissant is warm. Solution Check if the plug has been properly inserted into the wall socket. If the toaster still does not work, take it to a service centre authorised by Philips for examination. Unplug the appliance and let it cool down. Carefully remove the slice or slices from the toaster.take care not to damage the heating elements while removing the slice or slices of bread. Never use a metal object for this purpose. Check the browning setting selected for toasting. Select a lower setting next time if your toast is too dark and a higher setting if your toast is too light. You have chosen a too high setting for the type of bread inserted. Push the stop button to stop the toasting process. If the mains cord of this appliance is damaged, it must always be replaced by Philips, a service centre authorised by Philips or similarly qualified persons in order to avoid a hazard. You have pressed the one-side toasting button Ù (type HD2615 only).that is why only one side of the bread has been toasted.to toast the other side as well, put the bread in the slot with the untoasted side facing the front of the toaster and press the one-side toasting button again. This is normal, for the toaster has a fixed temperature setting for warming up rolls and croissants, which guarantees a perfect end result. Turn your roll or croissant over and warm it up again. Follow the instructions in 'Heating up rolls or croissants'.
10 10 ESPAÑOL Descripción general (fig. 1) A Bandeja recogemigas B Botón de parada C Palanca de tostado D Palanca de bandeja calientabollos E Botón de calentamiento (HD2613, HD2615) Posición de calentamiento (HD2611) F Botón de recalentar (HD2613) Posición de recalentar (HD2611, HD2615) G Botón de descongelar (HD2613, HD2615) Posición de descongelar (HD2611) H Botón de tostado por un solo lado (HD2615) I Control de tostado Importante Antes de usar el aparato, lea atentamente estas instrucciones y consérvelas por si necesitara consultarlas en el futuro. Antes de conectar el aparato, compruebe si el voltaje indicado en la parte inferior del aparato se corresponde con el voltaje de la red local. Conecte el aparato sólo a un enchufe con toma de tierra. Si el cable de red está dañado, debe ser sustituido por Philips, un centro de servicio autorizado por Philips o personal cualificado para evitar situaciones de peligro. No sumerja el aparato o el cable de red en agua u otros líquidos. Desenchufe siempre el aparato después de utilizarlo. Mantenga el aparato fuera del alcance de los niños. Evite que el cable de red cuelgue por el borde de la mesa o encimera y manténgalo lejos de superficies calientes. No deje nunca que el aparato funcione sin vigilancia. No ponga a funcionar el aparato debajo o cerca de cortinas u otros materiales inflamables, ni bajo los armarios de pared.tenga en cuenta que el pan se puede quemar. Evite tocar las partes metálicas del tostador ya que se calientan mucho durante el proceso de tostado.toque sólo los controles y levante el aparato sujetándolo por la parte de plástico. El tostador está ideado sólo para uso doméstico y únicamente puede utilizarse en interiores. Para evitar el peligro de incendio, recoja con frecuencia las migas de la bandeja recogemigas. Asegúrese de que la bandeja recogemigas está colocada correctamente. Desenchufe inmediatamente el aparato si observa fuego o humo. Si una rebanada de pan se queda encajada en el tostador, desenchufe el aparato y deje que se enfríe antes de sacar el pan. No utilice cuchillos o instrumentos de punta afilada, ya que podría dañar las piezas de calentamiento. Este aparato está diseñado únicamente para tostar pan. No ponga otros ingredientes en el aparato, ya que podría ser peligroso. No debe introducir en el tostador ni comida demasiado grande ni paquetes de papel de aluminio, ya que podrían provocar un incendio o una descarga eléctrica. No coloque la funda para el polvo (sólo en algunos modelos) en el tostador cuando el aparato esté conectado o cuando aún esté caliente, ya que podría causar daños. No coloque el tostador sobre una superficie caliente. La bandeja calientabollos sirve únicamente para calentar bollos o croissants. No coloque ningún otro ingrediente en la bandeja calientabollos, ya que podría producirse una situación de peligro.
11 ESPAÑOL 11 Antes de utilizarlo por primera vez Quite las etiquetas y limpie el exterior del tostador con un paño húmedo. Antes de utilizar el aparato por primera vez, le recomendamos que ponga en marcha el tostador para que complete algunos ciclos de tostado sin pan en la posición de tostado más alta en una habitación adecuadamente ventilada. Así conseguirá quemar el posible polvo que se pueda haber acumulado en los elementos calefactores y evitará olores desagradables cuando tueste pan. Cómo usar el aparato 1 Ponga el tostador en una superficie estable y plana, lejos de cortinas u otros materiales inflamables. Conecte el aparato a la red. Puede ajustar la longitud del cable enrollándolo en los soportes de la base del aparato (fig. 2). Cómo tostar pan No deje nunca el tostador desatendido si está en funcionamiento. 1 Ponga una o dos rebanadas de pan en el tostador (fig. 3). 2 Seleccione la posición de tostado deseada (fig. 4). Seleccione una posición baja (1-2) para pan poco tostado y una posición alta para pan muy tostado (5-7). 3 Baje la palanca para conectar el aparato (fig. 5). - Se ilumina el botón de parada. - La palanca se mantendrá abajo sólo si el aparato está conectado a la red. Las partes metálicas del tostador se calentarán durante el proceso de tostado.tenga cuidado de no tocarlas. 4 Cuando el pan está listo, salta y el tostador se desconecta. El tostador se desconectará automáticamente. Puede detener el proceso de tostado y sacar el pan en cualquier momento pulsando el botón de parada de la parte superior del tostador (fig. 6). Para sacar trozos pequeños, puede mover hacia arriba la palanca de tostado Si el pan se queda encajado en la tostadora, desenchufe el aparato, deje que se enfríe completamente y después saque con cuidado el pan del tostador. No utilice objetos de metal afilados o cuchillos y evite tocar las partes metálicas internas del tostador. Cómo tostar pan congelado Modelo HD2611: 1 Siga las instrucciones del apartado 'Cómo tostar pan', pero coloque el control de tostado en la posición y después baje la palanca de tostado (fig. 7). Modelos HD2613 y HD2615: 2 Siga las instrucciones del apartado 'Cómo tostar pan', pero baje la palanca de tostado y después pulse el botón de descongelar (fig. 8). Se ilumina el botón. Nota: tardará más en tostar pan congelado que pan descongelado.
12 12 ESPAÑOL Cómo recalentar pan tostado Modelos HD2611 y HD2615: 1 Siga las instrucciones del apartado 'Cómo tostar pan', pero coloque el control de tostado en la posición ç y después baje la palanca de tostado (fig. 9). Modelo HD2613: 2 Siga las instrucciones del apartado 'Cómo tostar pan', pero baje la palanca de tostado y después pulse el botón de recalentar ç (fig. 10). Se ilumina el botón. Cómo tostar pan por un solo lado (sólo modelo HD2615) Ideal para tostar panecillos y baguettes. 1 Abra por la mitad el panecillo o la baguette y corte la baguette con una longitud máxima de 13 cm. 2 Coloque el pan en el tostador con el lado que quiera tostar mirando hacia la parte frontal del tostador (fig. 11). 3 Siga las instrucciones del apartado 'Cómo tostar pan', pero baje la palanca de tostado y luego pulse el botón de tostado por un solo lado Ù (fig. 12). Se ilumina el botón. Antes de cada ciclo de tostado de pan por un solo lado, debe bajar la palanca de tostado y pulsar de nuevo el botón de tostado por un solo lado Ù Puede combinar esta función con la posición para tostar pan congelado. Cómo calentar bollos y croissants 1 Baje la palanca de la bandeja calientabollos para que se abra la bandeja calientabollos (fig. 13). Nunca coloque los bollos que desea calentar directamente encima del tostador sin haber abierto antes la bandeja calientabollos para evitar que se dañe el tostador. 2 Coloque los bollos o croissants encima de la bandeja calientabollos. No caliente más de 2 trozos al mismo tiempo. Modelos HD2613 y HD2615: 3 Baje la palanca de tostado y pulse el botón de calentamiento Û Se ilumina el botón (fig. 14). Si desea calentar los bollos y croissants por ambos lados, gírelos después de que el tostador se desconecte automáticamente y vuelva a encender el tostador bajando la palanca de tostado y luego pulsando el botón de calentamiento Û. Antes de cada ciclo nuevo de calentamiento, debe presionar la palanca de tostado hacia abajo y pulsar de nuevo el botón de calentamiento. Modelo HD2611: 4 Coloque el control de tostado en la posición Û y baje la palanca de tostado (fig. 15). Si desea calentar los bollos y croissants por ambos lados, gírelos después de que el tostador se desconecte automáticamente. Deje el control de tostado configurado en la posición de calentamiento Û y vuelva a conectar el tostador bajando la palanca de tostado.
13 ESPAÑOL 13 Limpieza 1 Desenchufe el aparato. 2 Deje enfriar el aparato. 3 Limpie el aparato con un paño húmedo. No utilice productos de limpieza abrasivos. No sumerja el aparato en agua. 4 Para quitar las migas, saque el recogemigas del aparato (fig. 16). No dé la vuelta al aparato ni lo sacuda para sacar las migas. Garantía y servicio Si necesita información o si tiene algún problema, visite la página web de Philips en o póngase en contacto con el Servicio Philips de Atención al Cliente de su país (hallará el número de teléfono en el folleto de la Garantía Mundial). Si en su país no hay Servicio Philips de Atención al Cliente, diríjase a su distribuidor local Philips o póngase en contacto con el Service Department of Philips Domestic Appliances and Personal Care BV. Guía de resolución de problemas Si no es capaz de resolver los problemas con esta guía de resolución de problemas, póngase en contacto con el Servicio Philips de Atención al Cliente de su país (consulte capítulo 'Garantía y servicio'). Problema Solución 1. El tostador no funciona Compruebe que ha enchufado correctamente el aparato a la red. Si el tostador sigue sin funcionar, llévelo a un centro de servicio autorizado por Philips para que lo examinen. 2. El pan se queda Desenchufe el aparato y deje que se enfríe. Saque cuidadosamente las rebanadas encajado en el aparato de pan del tostador.tenga cuidado de no dañar los elementos calefactores cuando saque las rebanadas de pan. No utilice nunca objetos metálicos para este fin. 3. El pan está Compruebe la posición de tostado que ha seleccionado para tostar. Seleccione demasiado/poco una posición más baja la próxima vez si el pan está demasiado tostado y una tostado posición más alta si el pan está muy poco tostado. Ha seleccionado una posición demasiado alta para la clase de pan que ha 4. Sale humo del tostador. introducido. Pulse el botón de parada para detener el proceso de tostado. 5. El cable de red está Si el cable de red del aparato estuviera deteriorado, deberá ser sustituido siempre deteriorado por Philips, un centro de servicio autorizado de Philips o personal similar cualificado para evitar situaciones peligrosas. 6. Se ha tostado el pan Ha pulsado el botón de tostado por un solo lado Ù (sólo modelo HD2615). Por por un solo lado eso sólo se ha tostado el pan por un solo lado. Para tostar bien el otro lado del pan, coloque el pan en la ranura con el lado sin tostar hacia la parte frontal del tostador y pulse de nuevo el botón de tostado por un solo lado. 7. No puedo cambiar el nivel de tostado cuando utilizo la función de calentamiento. 8. Un lado del bollo o del croissant está caliente. Es algo normal. El tostador tiene una posición de temperatura fija para calentar bollos y croissants que garantiza un resultado final perfecto. Gire el bollo o el croissant y vuelva a calentarlo. Siga las instrucciones que aparecen en 'Cómo calentar bollos y croissants'.
14 14 ITALIANO Descrizione generale (fig. 1) A Vassoio raccoglibriciole B Pulsante stop C Leva tostatura D Leva griglietta E Pulsante per riscaldare (HD1613, HD2615) Impostazione riscaldamento F Pulsante per riscaldare (HD2613) Impostazione riscaldamento (HD2611, HD2615) G Pulsante per scongelare (HD2613, HD2615) mpostazione scongelamento (HD2611). H Pulsante per tostare su un solo lato (HD2615) I Controllo doratura Importante Leggete queste istruzioni con attenzione prima di usare l'apparecchio e conservatele per future consultazioni. Prima di collegare l'apparecchio, controllate che la tensione indicata sulla parte inferiore dell'apparecchio corrisponda a quella della rete locale. Collegata l'apparecchio solo ed esclusivamente ad una presa dotata di messa a terra. Nel caso il cavo fosse danneggiato, dovrà essere sostituito presso un Centro Autorizzato Philips o comunque da personale debitamente autorizzato, per evitare situazioni a rischio. Non immergete l'apparecchio o il cavo di alimentazione in acqua o altri liquidi. Dopo l'uso, togliete sempre la spina dalla presa. Tenete l'apparecchio lontano dalla portata dei bambini. Fate in modo che il cavo non penzoli sugli spigoli della tavola o del piano di lavoro e tenete il cavo lontano dalle superfici bollenti. Non lasciate mai incustodito l'apparecchio in funzione. Non usatelo sotto o vicino a tende o altri materiali infiammabili e neppure sotto i pensili della cucina, perché il pane potrebbero prendere fuoco. Evitate di toccare le parti metalliche del tosta fette, che durante l'uso diventano bollenti. Toccate solo gli appositi pulsanti e se dovete alzare l'apparecchio, utilizzate le parti in plastica. Il tosta fette è destinato esclusivamente a uso domestico e deve essere usato all'interno. Per evitare il rischio di incendi, togliete spesso le briciole dal vassoio raccoglibriciole. Controllate anche che il vassoio sia posizionato in modo corretto. Nel caso notaste fumo o fiamme, togliete immediatamente la spina dalla presa di corrente. Nel caso una fetta di pane si incastrasse all'interno del tosta fette, togliete la spina dalla presa e lasciate raffreddare l'apparecchio prima di rimuovere la fetta. Non usate coltelli o utensili a punta per evitare di danneggiare la serpentina. L'apparecchio deve essere usato unicamente per tostare il pane. Non inserite altri ingredienti nell'apparecchio, per evitare situazioni pericolose. Non inserite cibi troppo voluminosi o carta d'alluminio nell'apparecchio, per evitare il rischio di scintille o scariche elettriche. Non appoggiate il coperchio antipolvere (solo per alcuni modelli) sull'apparecchio in funzione o quando è ancora caldo, per evitare di danneggiarlo. Non appoggiate il tosta fette su una superficie calda. La griglietta deve essere utilizzata esclusivamente per riscaldare panini o croissant. Non mettete altri ingredienti sulla griglietta, per evitare situazioni a rischio.
15 ITALIANO 15 Prima di usare l'apparecchio per la prima volta Togliete eventuali adesivi e pulite la parte esterna dell'apparecchio con un panno umido. Prima di usare l'apparecchio per la prima volta, vi consigliamo di far compiere all'apparecchio alcuni cicli completi di tostatura senza inserire il pane, impostando il valore massimo di doratura, in un locale ben ventilato. In questo modo verrà eliminata la polvere eventualmente accumulata sulla serpentina ed eviterete odori sgradevoli quando tosterete il pane. Come usare l'apparecchio 1 Appoggiate l'apparecchio su una superficie piana e stabile, lontano da tende e altri materiali combustibili. Inserite la spina nella presa di corrente. Potete regolare la lunghezza del cavo avvolgendo la parte eccedente attorno agli appositi supporti, alla base dell'apparecchio (fig. 2). Come tostare il pane Non lasciate mai incustodito l'apparecchio in funzione. 1 Inserite una o due fette di pane nel tosta fette (fig. 3). 2 Selezionata l'impostazione di doratura desiderata (fig. 4). Selezionate un'impostazione bassa (1-2) per ottenere del pane leggermente tostato e un'impostazione più alta (5-7) per una doratura più decisa. 3 Abbassate la leva per accendere l'apparecchio (fig. 5). - Il pulsante stop si accende. - La leva del tostapane rimarrà abbassata solo se è stata inserita la spina nella presa. Le parti in metallo dell'apparecchio diventano bollenti durante l'uso. Fate attenzione a non toccarle! 4 Quando il pane è pronto, salta fuori automaticamente e l'apparecchio si spegne. Il tosta fette si spegne automaticamente. Per interrompere il processo di tostatura e togliere il pane in qualsiasi momento, premete il pulsante STOP posto sulla parte superiore dell'apparecchio (fig. 6). Per togliere pezzi piccoli, muovete leggermente la leva verso l'alto. Nel caso rimanga incastrato un pezzo di pane all'interno del tostapane, togliete la spina dalla presa e lasciate raffreddare completamente l'apparecchio prima di togliere il pezzetto incastrato. Non usate coltelli o oggetti metallici ed evitate di toccare le parti metalliche del tostapane. Come tostare il pane congelato Modello HD2611: 1 Seguite le istruzioni riportate nella sezione "Come tostare il pane" ma impostate il livello di doratura su e abbassate la leva (fig. 7). Modelli HD2613 e HD2615: 2 Seguite le istruzioni riportate nella sezione "Come tostare il pane" ma abbassate la leva e premete il pulsante di scongelamento (fig. 8). Il pulsante si accende. Nota: la tostatura del pane congelato richiede più tempo rispetto al pane scongelato.
16 16 ITALIANO Come riscaldare il pane tostato Modelli HD2611 e HD Seguite le istruzioni riportate nella sezione "Come tostare il pane" ma impostate il livello di doratura su ç e abbassate la leva (fig. 9). Modello HD Seguite le istruzioni riportate nella sezione "Come tostare il pane" ma abbassate la leva e premete il pulsante per riscaldare ç (fig. 10). Il pulsante si accende. Come tostare il pane su un solo lato (solo mod. HD2615) Ideale per tostare panini e baguette. 1 Tagliate a metà per la baguette e riducete i panini alla lunghezza massima di 13 cm. 2 Mettete il pane nel tosta fette con il lato da tostare rivolto verso la parte anteriore dell'apparecchio (fig. 11). 3 Seguite le istruzioni riportate nella sezione 'Come tostare il pane'ma abbassate la leva e premete il pulsante per tostare su un solo lato Ù (fig. 12). Il pulsante si accende. Prima di ciascuna tostatura su un solo lato, dovrete abbassare la leva e premere nuovamente il pulsante per tostare su un solo lato Ù. Potete usare questa funzione anche abbinata all'impostazione per la tostatura del pane congelato. Come riscaldare panini e croissant 1 Premete verso il basso la leva della griglietta, per estrarre quest'ultima (fig. 13). Non mettete mai i panini da riscaldare direttamente sulla parte superiore dell'apparecchio senza aver estratto l'apposita griglietta, per evitare di danneggiare l'apparecchio. 2 Appoggiate i panini o i croissant sulla griglietta. Non riscaldate più di 2 pezzi alla volta. Modelli HD2613 e HD2615: 3 Abbassate la leva e premete il pulsante per riscaldare Û. Si accende il pulsante (fig. 14). Se volete riscaldare i panini o i croissant su entrambi i lati, girateli non appena l'apparecchio si spegne e accendetelo nuovamente abbassando la leva e premendo il pulsante per riscaldare Û. Prima di ciascun nuovo ciclo di riscaldamento, dovrete abbassare nuovamente la leva e premere il pulsante di riscaldamento. Modello HD2611: 4 Impostate il dispositivo di doratura su Û e abbassate la leva (fig. 15). Se volete riscaldare i panini o i croissant su entrambi i lati, girateli non appena l'apparecchio si spegne. Lasciate il dispositivo di doratura impostato su Ûe accendete nuovamente l'apparecchio abbassando la leva.
17 ITALIANO 17 Pulizia 1 Staccate la spina dalla presa di corrente. 2 Lasciate raffreddare l'apparecchio. 3 Pulite l'apparecchio con un panno umido. Non usate prodotti o sostanze abrasive. Non immergete mai l'apparecchio nell'acqua. 4 Per togliere le briciole dall'apparecchio, estraete il vassoio sfilandolo dal tostapane (fig. 16). Non capovolgete l'apparecchio e non scuotetelo per eliminare le briciole. Garanzia e Assistenza Per ulteriori informazioni o in caso di problemi, vi preghiamo di visitare il sito Philips su oppure contattare il Centro Assistenza Clienti Philips del vostro paese (troverete il numero di telefono sull'opuscolo della garanzia). Qualora nel vostro paese non ci siano Centri Assistenza Philips, rivolgetevi al rivenditore autorizzato Philips oppure contattate il Service Department of Philips Domestic Appliances and Personal Care BV. Localizzazione guasti Se non riuscite a risolvere il vostro problema con l'aiuto di questa tabella di localizzazione guasti, rivolgetevi al Centro Assistenza Clienti del vostro paese (vedere il capitolo "Garanzia e Assistenza"). Problema 1. Il tosta fette non funziona. 2. Si è incastrato del pane nell'apparecchio 3. Il pane è troppo scuro/chiaro. 4. Dall'apparecchio fuoriesce del fumo 5. Il cavo di alimentazione è danneggiato. 6. Il pane è stato tostato solo su un lato 7. Non riesco a modificare il livello di doratura quando uso la funzione di riscaldamento. 8. Il panino o il croissant è caldo solo da un lato Soluzione Controllate di aver inserito correttamente la spina nella presa di corrente. Se l'apparecchio non funziona comunque, portatelo presso un Centro Assistenza Philips per farlo controllare. Togliete la spina dalla presa e lasciate raffreddare l'apparecchio.togliete delicatamente la fetta o le fette di pane dall'apparecchio, facendo attenzione a non danneggiare la serpentina. Non usate oggetti metallici! Controllate l'impostazione di doratura che avete selezionato. Se il pane è troppo scuro, selezionate un valore più basso. Se è troppo chiaro, selezionate un valore più alto. Avete selezionato un'impostazione troppo alta per il tipo di pane da tostare. Premete il pulsante stop per interrompere la tostatura. Nel caso in cui il cavo di alimentazione fosse danneggiato, dovrà essere sostituito esclusivamente presso un Centro Autorizzato Philips o personale debitamente qualificato, per evitare situazioni a rischio. Avete premuto il pulsante Ù per tostare su un solo lato (solo modello HD2615). E' per questo che il pane risulta tostato solo su un lato. Per tostare anche l'altro lato, infilate il pane nella fessura con la parte non tostata rivolta verso la parte anteriore dell'apparecchio e premete nuovamente il pulsante per tostare su un solo lato. E' del tutto normale, dal momento che il tosta fette prevede un'impostazione fissa per riscaldare panini e croissant, per garantire un perfetto risultato finale. Girate il panino o il croissant e riscaldatelo dall'altra parte. Seguite le istruzioni riportate nella sezione "Come riscaldare panini o croissant".
18 18 PORTUGUÊS Descrição geral (fig. 1) A Tabuleiro das migalhas B Botão 'stop' C Manípulo D Manípulo da rede de aquecimento E Botão de aquecimento (HD2613, HD2615) Regulação de aquecimento (HD2611) F Botão de reaquecimento (HD2613) Regulação de reaquecimento (HD2611, HD2615) G Botão de descongelação (HD2613, HD2615) Regulação de descongelação (HD2611) H Tostar de um só lado (HD2615) I Controlo do grau de torragem Importante Antes de se servir da torradeira, leia atentamente estas instruções e guarde-as para uma eventual consulta futura. Antes de ligar à corrente, verifique se a voltagem indicada na base do aparelho corresponde à voltagem do local. Ligue sempre numa tomada com terra. Se o fio estiver estragado, só deverá ser substituído pela Philips, por um concessionário autorizado pela Philips ou por pessoal igualmente qualificado para se evitarem situações de perigo para o utilizador. Nunca mergulhe o aparelho ou o fio dentro de água ou outros líquidos. Desligue sempre da corrente quando terminar. Mantenha afastado do alcance das crianças. Não deixe o fio suspenso para fora da mesa ou da bancada de trabalho e mantenha-o afastado de superfícies quentes. Não deixe o aparelho ligado sem estar alguém por perto. Não ligue debaixo ou perto de cortinas ou de outros materiais inflamáveis ou em armários, porque o pão pode queimar-se e arder. Evite tocar as peças metálicas da torradeira porque ficam muito quentes durante o processamento. Só deve tocar nos botões e levantar o aparelho segurando-o pela parte plástica. Esta torradeira destina-se unicamente a uso doméstico e só pode ser usada dentro de casa. Para evitar o risco de incêndio, retire as migalhas do tabuleiro com regularidade. Certifiquese que o tabuleiro das migalhas fica bem colocado. Se observar chamas ou fumos, desligue imediatamente da corrente. Se ficar uma fatia de pão presa dentro da torradeira, desligue da correne e deixe arrefecer antes de tentar retirar o pão. Não se sirva de facas ou de objectos afiados porque poderá estragar as resistências. Este aparelho destina-se apenas a torrar pão. Não coloque outros ingredientes dentro da torradeira para evitar situações prejudiciais e gravosas. Alimentos muito grandes e embalagens de alumínio não devem ser introduzidos na torradeira para não provocar algum incêndio ou choque eléctrico. Não coloque a cobertura de protecção contra poeiras (apenas nalguns modelos) sobre a torradeira se esta estiver ligada ou ainda estiver quente para evitar danos. Não coloque a torradeira sobre superfícies quentes. A rede de aquecimento destina-se unicamente ao aquecimento de pãezinhos ou de croissants. Não coloque outros alimentos sobre a rede para evitar a ocorrência de alguma situação perigosa.
19 PORTUGUÊS 19 Antes da primeira utilização Retire todos os autocolantes e limpe o corpo da torradeira com um pano húmido. Antes de se servir da torradeira pela primeira vez, é aconselhável deixá-la efectuar dois ciclos completos, sem colocar nenhuma fatia de pão, na regulação mais alta e num local devidamente ventilado. Desta forma, as poeiras que possam estar acumuladas nas resistências queimar-se-ão e evitar-se-ão cheiros desagradáveis quando se for torrar o pão. Utilização 1 Coloque a torradeira sobre uma superfície estável e plana, afastada de cortinas e de outros materiais combustíveis. Ligue a ficha à tomada eléctrica. O comprimento do fio pode ser ajustado enrolando o excesso à volta dos suportes existentes na base da torradeira (fig. 2). Torrar pão Nunca deixe a torradeira a funcionar sem estar por perto. 1 Coloque uma ou duas fatias de pão na torradeira (fig. 3). 2 Seleccione o grau de torragem desejado (fig. 4). Seleccione uma regulação baixa (1-2) para torrar ligeiramente e uma regulação alta (5-7) para ficar mais torrado. 3 Empurre o manípulo para baixo para ligar a torradeira (fig. 5). - O botão 'stop' acende-se. - O manípulo só fica preso se a torradeira estiver ligada à corrente. As peças metálicas da torradeira aquecem durante o processamento.tenha cuidado para não lhes tocar. 4 Quando a torrada fica pronta, salta e a torradeira desliga-se. A torradeira desliga-se automaticamente. O processo pode ser interrompido e o pão pode ser retirado em qualquer altura se premir o botão STOP (fig. 6). Para remover peças mais pequenas, pode puxar o manípulo um pouco mais para cima. Se o pão ficar preso no interior da torradeira, retire a ficha da tomada de corrente, deixe arrefecer completamente e remova cuidadosamente o pão de dentro da torradeira. Não se sirva de facas ou de outros objectos metálicos afiados e não toque nas peças metálicas internas da torradeira. Torrar pão congelado Modelo HD2611: 1 Siga as instruções dadas em 'Torrar pão', mas rode o botão para a regulação e empurre o manípulo para baixo (fig. 7). Modelos HD2613 e HD2615: 2 Siga as instruções dadas em 'Torrar pão', mas empurre o manípulo para baixo e depois pressione o botão de descongelação (fig. 8). O botão ilumina-se. Nota: o pão congelado demora mais tempo a torrar do que o pão descongelado.
20 20 PORTUGUÊS Reaquecer pão torrado Modelos HD2611 e HD2615: 1 Siga as instruções dadas em 'Torrar pão', mas rode o botão para a regulação ç e empurre o manípulo para baixo (fig. 9). Modelo HD2613: 2 Siga as instruções dadas em 'Torrar pão', mas empurre o manípulo para baixo e depois pressione o botão de reaquecimento ç (fig. 10). O botão ilumina-se. Torrar de um só lado (apenas mod. HD2615) Ideal para torrar cacetes e baguetes. 1 Corte o pão ao meio no sentido do comprimento e encurte-o para um tamanho máx. de 13 cm. 2 Introduza o pão na torradeira com o lado a torrar virado para a parte da frente da torradeira (fig. 11). 3 Siga as instruções dadas em 'Torrar pão', mas empurre o manípulo para baixo e depois pressione o botão para torrar de um lado Ù (fig. 12). O botão ilumina-se. Antes de cada novo ciclo de torragem de um só lado, terá de empurrar o manípulo para baixo e pressionar novamente o botão para torrar de um lado Ù. Também pode usar esta função em conjugação com a regulação para torrar pão congelado. Aquecer pãezinhos e croissants 1 Empurre o manípulo da rede de aquecimento para baixo para abrir a rede (fig. 13). Nunca coloque os pãezinhos directamente sobre a torradeira sem ter aberto a rede de aquecimento para evitar estragar a torradeira. 2 Coloque os pãezinhos ou os croissants sobre a rede de aquecimento. Não aqueça mais do que 2 peças de cada vez. Modelos HD2613 e HD2615: 3 Empurre o manípulo para baixo e pressione o botão de aquecimento Û. O botão ilumina-se (fig. 14). Se quiser aquecer os pãezinhos ou os croissants dos dois lados, vire-os depois de a torradeira se desligar e volte a ligá-la, empurrando o manípulo para baixo e voltando a premir o botão de aquecimento Û. Antes de cada novo ciclo de torragem, terá de empurrar o manípulo para baixo e pressionar novamente o botão de aquecimento. Modelo HD2611: 4 Rode o botão para a regulação Û e empurre o manípulo para baixo (fig. 15). Se quiser aquecer os pãezinhos ou os croissants dos dois lados, vire-os depois da torradeira se desligar. Deixe o controlo da regulação na posição de aquecimento Û e volte a ligar a torradeira empurrando o manípulo para baixo.
21 PORTUGUÊS 21 Limpeza 1 Desligue da corrente. 2 Deixe a torradeira arrefecer. 3 Limpe a torradeira com um pano húmido. Não use produtos de limpeza abrasivos. Nunca mergulhe dentro de água. 4 Retire a bandeja para fora da torradeira e remova as migalhas (fig. 16). Não vire a torradeira de cabeça para baixo nem a sacuda para retirar as migalhas. Garantia e assistência Se necessitar de informações ou se tiver algum problema, por favor visite a página da Philips em ou contacte o Centro de Informação ao Consumidor Philips do seu país (encontrará os números de telefone no folheto da garantia mundial). Se não existir um Centro de Informação ao Consumidor Philips no seu país, por favor dirija-se ao seu agente Philips local ou contacte o Departamento de Service da Philips Domestic Appliances and Personal Care BV. Resolução de problemas Se não conseguir resolver o problema com as indicações deste guia, contacte o Centro de Informação ao Consumidor do seu país (vidé capítulo 'Garantia e assistência'). Problema 1. A torradeira não funciona. 2. O pão fica preso na torradeira. 3. A torrada fica demasiado escura/demasiado clara. 4. Sai fumo da torradeira. 5. O fio está estragado. 6. Um dos lados do pão não ficou torrado. 7. Não se consegue mudar o grau de torragem quando se usa a função de aquecimento. 8. O pãozinho ou o croissant só aqueceram de um dos lados. Solução Verifique se a ficha está correctamente introduzida na tomada eléctrica. Se a torradeira continuar sem funcionar, leve-a a um concessionário autorizado pela Philips para ser verificada. Desligue da corrente e deixe arrefecer. Com cuidado, retire a fatia ou as fatias de pão para fora da torradeira.tenha atenção para não danificar as resistências quando remover o pão. Nunca se sirva de objectos metálicos. Verifique a regulação de torragem seleccionada. Seleccione uma regulação mais baixa se a torrada ficar muito escura e uma regulação mais alta se a torrada ficar muito clara. Escolheu uma regulação muito alta para o tipo de pão utilizado. Empurre o botão 'stop' para interromper o trabalho. Se o fio da torradeira se estragar, só deverá ser substituído pela Philips, por um concessionário autorizado pela Philips ou por pessoal igualmente qualificado para se evitarem situações gravosas para o utilizador. Deve ter pressionado o botão Ù (apenas mod. HD2615) para torrar de um só lado. É por isso que o pão não fica todo torrado. Para torrar dos dois lados, introduza o pão na abertura com o lado que não estiver torrado virado para a parte da frente da torradeira e volte a premir o botão 'torrar de um só lado'. É normal, porque a torradeira tem uma regulação de temperatura fixa para o aquecimento de pãezinhos e de croissants para garantir um resultado final perfeito. Vire o pãozinho ou o croissant do outro lado e volte a aquecer. Siga as instruções 'Aquecer pãezinhos ou croissants'.
22 22 ΕΛΛΗΝΙΚΑ Γενική περιγραφή (εικ. 1) A Δίσκος για τα ψίχουλα B Κουμπί stop C Μοχλός ψησίματος D Μοχλός σχάρας για ζέσταμα E Κουμπί για ζέσταμα (HD2613, HD2615) Ρύθμιση για ζέσταμα (HD2611) F Κουμπί για ξαναζέσταμα Ρύθμιση για ξαναζέσταμα (HD2611, HD2615) G Κουμπί απόψυξης (HD2613, HD2615) Ρύθμιση απόψυξης (HD2611) H Κουμπί για ψήσιμο από τη μια πλευρά (HD2615) I Έλεγχος ψησίματος Σημαντικό Διαβάστε προσεκτικά αυτές τις οδηγίες χρήσης πριν χρησιμοποιήσετε τη συσκευή και φυλάξτε τις για μελλοντική αναφορά. Ελέγξτε αν η τάση που αναφέρεται στο κάτω μέρος της συσκευής αντιστοιχεί στην τοπική τάση του σπιτιού σας πριν συνδέσετε τη συσκευή. Συνδέστε τη συσκευή σε μία γειωμένη πρίζα. Αν το καλώδιο έχει υποστεί βλάβη, θα πρέπει να αντικαστασταθεί από τη Philips, ένα κέντρο σέρβις εξουσιοδοτημένο από τη Philips ή εξίσου έμπειρους τεχνικούς προκειμένου να αποφευχθούν κίνδυνοι. Μην βυθίζετε τη συσκευή ή το τροφοδοτικό σε νερό ή σε άλλα υγρά. Να βγάζετε πάντα τη συσκευή από την πρίζα μετά τη χρήση. Κρατήστε τη συσκευή μακριά από τα παιδιά. Μην αφήνετε το καλώδιο να κρέμεται από την άκρη του τραπεζιού ή του πάγκου εργασίας και κρατήστε το καλώδιο μακριά από ζεστές επιφάνειες. Μην αφήνετε τη συσκευή να λειτουργεί χωρίς επίβλεψη. Μην την χρησιμοποιείτε κάτω ή κοντά σε κουρτίνες ή άλλα εύφλεκτα υλικά ή κάτω από ντουλάπια τοίχων, επειδή το ψωμί μπορεί να καεί. Μην ακουμπάτε τα μεταλλικά μέρη της φρυγανιέρας επειδή ζεσταίνονται πολύ κατά το ψήσιμο. Να ακουμπάτε τα κουμπιά και να σηκώνετε τη συσκευή από τα πλαστικά της μέρη. Η φρυγανιέρα προορίζεται μόνο για οικιακή χρήση και μπορεί να χρησιμοποιηθεί μόνο σε εσωτερικούς χώρους. Για να αποφύγετε τον κίνδυνο πυρκαγιάς, να βγάζετε τακτικά τα ψίχουλα από το δίσκο. Βεβαιωθείτε ότι ο δίσκος για τα ψίχουλα έχει τοποθετηθεί σωστά. Βγάλτε αμέσως τη φρυγανιέρα από την πρίζα αν παρατηρήσετε φωτιά ή καπνό. Αν μια φέτα ψωμί κολλήσει μέσα στην φρυγανιέρα, βγάλτε τη συσκευή από την πρίζα και αφήστε τη να κρυώσει πριν προσπαθήσετε να βγάλετε το ψωμί. Μην χρησιμοποιείτε μαχαίρι ή αιχμηρά εργαλεία, καθώς μπορεί να προκαλέσουν ζημιά στα θερμαντικά στοιχεία. Η συσκευή αυτή προορίζεται μόνο για να φρυγανίζετε ψωμί. Μην τοποθετείτε άλλα υλικά στην συσκευή, καθώς αυτό μπορεί να προκαλέσει επικίνδυνες καταστάσεις. Δεν θα πρέπει να τοποθετείτε τρόφιμα μεγάλου μεγέθους και μεταλλικές συσκευασίες μέσα στη φρυγανιέρα, καθώς αυτό μπορεί να προκαλέσει πυρκαγιά ή ηλεκτροπληξία. Μην τοποθετείτε το κάλυμμα κατά της σκόνης (μόνο σε μερικά μοντέλα) στο πάνω μέρος της φρυγανιέρας όταν η συσκευή είναι αναμμένη ή όταν είναι ακόμη ζεστή καθώς αυτό θα μπορούσε να προκαλέσει βλάβη.
23 ΕΛΛΗΝΙΚΑ 23 Μην τοποθετείτε τη φρυγανιέρα σε ζεστή επιφάνεια. Η σχάρα για ζέσταμα προορίζεται μόνο για να ζεσταίνεται ψωμάκια ή κρουασάν. Μην βάζετε άλλα υλικά πάνω στη σχάρα για ζέσταμα καθώς αυτό μπορεί να προκαλέσει κινδύνους. Πριν τη χρησιμοποιήσετε για πρώτη φορά Αφαιρέστε τα αυτοκόλλητα και καθαρίστε το εξωτερικό της φρυγανιέρας με ένα υγρό πανί. Πριν χρησιμοποιήσετε τη συσκευή για πρώτη φορά, σας συνιστούμε να αφήσετε τη συσκευή να ολοκληρώσει μερικούς κύκλους ψησίματος χωρίς ψωμί στην υψηλότερη ρύθμιση ψησίματος σε καλά αεριζόμενο δωμάτιο. Αυτό θα κάψει οποιαδήποτε σκόνη που μπορεί να έχει συσσωρευτεί στα θερμαντικά στοιχεία και έτσι θα αποφευχθούν οι δυσάρεστες οσμές κατά τη διάρκεια του ψησίματος. Χρήση της συσκευής 1 Τοποθετείστε τη συσκευή σε σταθερή και επίπεδη επιφάνεια, μακριά από κουρτίνες και άλλα εύφλεκτα υλικά. Βάλτε το φις στην πρίζα. Μπορείτε να ρυθμίσετε το μήκος του καλωδίου τυλίγοντας κάποιο τμήμα του γύρω από τα πλαίσια στη βάση της συσκευής (εικ. 2). Ψήσιμο ψωμιού Μην αφήνετε τη φρυγανιέρα να λειτουργεί χωρίς επιτήρηση. 1 Βάλτε μία ή δύο φέτες ψωμί στη φρυγανιέρα (εικ. 3). 2 Επιλέξτε την επιθυμητή ρύθμιση ψησίματος (εικ. 4). Επιλέξτε μια χαμηλή ρύθμιση (1-2) για ελαφρά φρυγανισμένο ψωμί και υψηλή ρύθμιση για καλοψημένο ψωμί (5-7). 3 Πιέστε το μοχλό ψησίματος προς τα κάτω για να ανάψετε τη συσκευή (εικ. 5). - Ανάβει το κουμπί stop. - Ο μοχλός παραμένει κάτω μόνο όταν η συσκευή έχει συνδεθεί στο ρεύμα. Τα μεταλλικά μέρη της φρυγανιέρας θα ζεσταθούν κατά τη διάρκεια του ψησίματος. Προσέξτε να μην τα ακουμπήσετε. 4 Όταν το ψωμί είναι έτοιμο, πετάγεται επάνω και η φρυγανιέρα σβήνει. Η φρυγανιέρα θα σβήσει αυτόματα. Μπορείτε να σταματήσετε τη διαδικασία ψησίματος και να βγάλετε το ψωμί οποιαδήποτε στιγμή πιέζοντας το κουμπί STOP στο πάνω μέρος της φρυγανιέρας (εικ. 6). Για να βγάλετε μικρότερα κομμάτια, μπορείτε να μετακινήσετε το μοχλό ψησίματος λίγο παραπάνω. Αν το ψωμί κολλήσει μέσα στη φρυγανιέρα, βγάλτε το βύσμα από την πρίζα, αφήστε τη συσκευή να κρυώσει εντελώς και αφαιρέστε προσεκτικά το ψωμί από τη φρυγανιέρα. Μην χρησιμοποιείτε μαχαίρι ή άλλο μεταλλικό αιχμηρό σκεύος και μην ακουμπάτε τα μεταλλικά εσωτερικά μέρη της φρυγανιέρας. Ψήσιμο κατεψυγμένου ψωμιού Μοντέλο HD2611: 1 Ακολουθείστε τις οδηγίες στην παράγραφο 'Ψήσιμο ψωμιού', αλλά γυρίστε το διακόπτη ψησίματος στη ρύθμιση και μετά πιέστε το μοχλό ψησίματος προς τα κάτω (εικ. 7).
24 24 ΕΛΛΗΝΙΚΑ Μοντέλα HD2613 και HD2615: 2 Ακολουθείστε τις οδηγίες στην παράγραφο 'Ψήσιμο ψωμιού', αλλά πιέστε το μοχλό ψησίματος προς τα κάτω και μετά πιέστε το κουμπί απόψυξης (εικ. 8). Το κουμπί ανάβει. Σημείωση: το ψήσιμο κατεψυγμένου ψωμιού διαρκεί περισσότερο από αυτό του αποψυγμένου ψωμιού. Ξαναζέσταμα ψημένου ψωμιού Μοντέλα HD2611 και HD2615: 1 Ακολουθείστε τις οδηγίες στην παράγραφο 'Ψήσιμο ψωμιού', αλλά γυρίστε το διακόπτη ψησίματος στη ρύθμιση ç και μετά πιέστε το μοχλό ψησίματος προς τα κάτω (εικ. 9). Μοντέλο HD2613: 2 Ακολουθείστε τις οδηγίες στην παράγραφο 'Ψήσιμο ψωμιού', αλλά πιέστε το μοχλό ψησίματος προς τα κάτω και μετά πιέστε το κουμπί ξαναζεστάματος ç (εικ. 10). Το κουμπί ανάβει. Ψήσιμο μόνο από τη μιά πλευρά (μόνο για το μοντέλο HD2615) Ιδανικό για να ψήνετε φρατζολάκια και μπαγκέτες. 1 Κόψτε το φρατζολάκι ή τη μπαγκέτα στη μέση κατά μήκος και σε μέγιστο μήκος 13 εκ. 2 Βάλτε το ψωμί στη φρυγανιέρα με την πλευρά που θα ψηθεί να βλέπει το μπροστινό μέρος της φρυγανιέρας (εικ. 11). 3 Ακολουθείστε τις οδηγίες στην παράγραφο 'Ψήσιμο ψωμιού', αλλά πιέστε το μοχλό ψησίματος προς τα κάτω και μετά πιέστε το κουμπί ψησίματος από τη μιά πλευρά Ù (εικ. 12). Το κουμπί ανάβει. Πριν από κάθε καινούργιο κύκλο ψησίματος από τη μιά πλευρά, θα πρέπει να πιέσετε το μοχλό ψησίματος προς τα κάτω και να πιέσετε ξανά το κουμπί για ψήσιμο από τη μια πλευρά Ù. Μπορείτε επίσης να χρησιμοποιήσετε αυτή τη λειτουργία σε συνδυασμό με τη ρύθμιση για ψήσιμο κατεψυγμένου ψωμιού. Πως να ζεστάνετε ψωμάκια και κρουασάν 1 Πιέστε το μοχλό της σχάρας ψησίματος προς τα κάτω για να βγει η σχάρα (εικ. 13). Μην βάζετε ποτέ τα ψωμάκια που θα ψηθούν κατευθείαν στο πάνω μέρος της φρυγανιέρας χωρίς να έχετε βγάλει τη σχάρα ζεστάματος για να αποφύγετε βλάβες στην φρυγανιέρα. 2 Βάλτε τα ψωμάκια ή τα κρουασάν στο πάνω μέρος της σχάρας ψησίματος. Μην ζεσταίνετε πάνω από 2 τεμάχια τη φορά. Μοντέλα HD2613 και HD2615: 3 Πιέστε το μοχλό ψησίματος προς τα κάτω και πιέστε το κουμπί ζεστάματος Û. Το κουμπί ανάβει (εικ. 14). Αν θέλετε να ζεστάνετε τα ψωμάκια ή τα κρουασάν και από τις δύο πλευρές, γυρίστε τα αφού η φρυγανιέρα έχει σβήσει και ανάψτε τη ξανά πιέζοντας το μοχλό ψησίματος προς τα κάτω και μετά πιέστε το κουμπί ζεστάματος Û.
25 ΕΛΛΗΝΙΚΑ 25 Πριν από κάθε κύκλο ζεστάματος, θα πρέπει να πιέζετε το μοχλό ψησίματος προς τα κάτω και να πιέζετε ξανά το κουμπί ζεστάματος. Μοντέλο HD2611: 4 Γυρίστε το διακόπτη ψησίματος στη ρύθμιση Û και πιέστε το μοχλό ψησίματος προς τα κάτω (εικ. 15). Αν θέλετε να ζεστάνετε τα ψωμάκια ή τα κρουασάν και από τις δύο πλευρές, γυρίστε τα αφού η φρυγανιέρα έχει σβήσει. Αφήστε το διακόπτη ψησίματος στη ρύθμιση ζεστάματος Û και ξανανάψτε τη φρυγανιέρα πιέζοντας το μοχλό ψησίματος προς τα κάτω. Καθαρισμός 1 Βγάλτε τη συσκευή από την πρίζα. 2 Αφήστε τη συσκευή να κρυώσει. 3 Καθαρίστε τη συσκευή με υγρό πανί. Μην χρησιμοποιείτε σκληρά καθαριστικά. Μην βυθίζετε ποτέ τη συσκευή σε νερό. 4 Βγάλτε τα ψίχουλα από τη συσκευή τραβώντας το δίσκο για τα ψίχουλα έξω από τη συσκευή (εικ. 16). Μην γυρίζετε τη συσκευή ανάποδα και μην την κουνάτε για να αφαιρέσετε τα ψίχουλα. Εγγύηση και σέρβις Εάν θέλετε κάποιες πληροφορίες ή έχετε κάποιο πρόβλημα, παρακαλούμε επισκεφτείτε την ιστοσελίδα της Philips στη διεύθυνση ή επικοινωνήστε με το τμήμα εξυπηρέτησης πελατών της Philips στη χώρα σας (θα βρείτε τον αριθμό τηλεφώνου στο διεθνές φυλλάδιο εγγύησης). Εάν δεν υπάρχει τμήμα εξυπηρέτησης πελάτων στη χώρα σας, απευθυνθείτε στον τοπικό αντιπρόσωπο της Philips ή επικοινωνήστε με το Τμήμα Σέρβις των Οικιακών Συσκευών και των Συσκευών Προσωπικής Φροντίδας BV της Philips. Οδηγός ανεύρεσης βλαβών Αν δεν μπορείτε να λύσετε το πρόβλημα με αυτόν τον οδηγό ανεύρευσης βλαβών, επικοινωνήστε με το Τμήμα Εξυπηρέτησης Πελατών στη χώρα σας (δείτε κεφάλαιο 'Εγγύηση και σέρβις').
Mistral GC2225, GC2220, GC2215, GC2120, GC2115, GC2110, GC2105
 Mistral GC2225, GC2220, GC2215, GC2120, GC2115, GC2110, GC2105 2 ENGLISH 4 ΕΛΛΗΝΙΚΑ 12 TÜRKÇE 22 GC2225, GC2220, GC2215, GC2120, GC2115, GC2110, GC2105 4 ENGLISH Important Read these instructions for use
Important Information
 Register your product and get support at www.philips.com/welcome 1 2 3 4 Important Information 5 4222.003.4076.1 ESPAÑOL Introducción Enhorabuena por la compra de este producto y bienvenido a Philips.
SK 7310 SU ISITICISI (KETTLE)
") SK 7310 SU ISITICISI (KETTLE) PT SINBO SK 7310 CHALEIRA MANUAL DE UTILIZAÇÃO PORTUGUESE ANTES DE UTILIZAR LEIA AS INSTRUÇÕES PRECAUÇÕES IMPORTANTES DE SEGURANÇA Deve obedecer aos seguintes avisos de segurança
SK 7310 SU ISITICISI (KETTLE) PT SINBO SK 7310 CHALEIRA MANUAL DE UTILIZAÇÃO PORTUGUESE ANTES DE UTILIZAR LEIA AS INSTRUÇÕES PRECAUÇÕES IMPORTANTES DE SEGURANÇA Deve obedecer aos seguintes avisos de segurança
Bebek Hamağı Kullanım Kılavuzu Baby Hammock User Guide
 Türk Patent Enstitüsü Tasarım Tescilli 5 Dakikada Kurulum Alman TÜV Rheinland Tarafından Güvenlik Onaylı Bebek Hamağı Kullanım Kılavuzu Baby Hammock User Guide Ürünün kurulum ve kullanımından önce kılavuzu
1000 W PANİMİNİ KULLANMA KILAVUZU INSTRUCTION MANUAL GEBRAUCHSANWEISUNG P İ İ Ş İ R M E Y Ü Z E Y
 P İ PANİMİNİ AR 297 MİDİ TOST MAKİNESİ AR 297 MIDI SANDWICH MAKER AR 297 MIDI SANDWICH MAKER KULLANMA KILAVUZU INSTRUCTION MANUAL GEBRAUCHSANWEISUNG 1000 W 2 ADET TOST 2 ESİ TYAPABİLME KAPASİ İ Ş YAPIŞMAZ
HD9240. User manual
 1 HD9240 User manual 2 3 4 5 6 7 8 9 10 11 12 13 14 15 16 17 18 19 4222.005.0416.2 Español Introducción Enhorabuena por la compra de este producto y bienvenido a Philips. Para sacar el mayor partido de
SSM 2521 (T,G) TOST MAK NASI
 TOST MAK NASI") SSM 2521 (T,G) TOST MAK NASI ES ESPANOL SINBO SSM 2521G, SSM 2521T MÁQUINA DEL TOSTADO MANUAL DEL USO Importante * Antés de usar el aparato en el futuro, leer estas instrucciones con cuidado y conservarlas
SSM 2521 (T,G) TOST MAK NASI ES ESPANOL SINBO SSM 2521G, SSM 2521T MÁQUINA DEL TOSTADO MANUAL DEL USO Importante * Antés de usar el aparato en el futuro, leer estas instrucciones con cuidado y conservarlas
D) Nota dominante (Güçlü): La nota de enlace entre el cuarteto y el quinteto, es decir, la nota Nevâ (Re). E) Notas de parada y decisión (Asma Karar):
 Nota dominante (Güçlü): La nota de enlace entre el cuarteto y el quinteto, es decir, la nota Nevâ (Re). E) Notas de parada y decisión (Asma Karar):") < MAAM UŞŞA A) Nota principal (Durak): La nota Dügâh (La). B) Marcha del Makam (eyri): Ascendente. C) Escala (Dizi): En su lugar un cuarteto Uşşak, al que se une un quinteto Bûselik empezado desde la nota
< MAAM UŞŞA A) Nota principal (Durak): La nota Dügâh (La). B) Marcha del Makam (eyri): Ascendente. C) Escala (Dizi): En su lugar un cuarteto Uşşak, al que se une un quinteto Bûselik empezado desde la nota
HD
 1 HD9240 2 3 4 5 6 7 8 9 10 11 12 13 14 15 16 17 18 4222.005.0416.3 ESPAÑOL Introducción Enhorabuena por la compra de este producto y bienvenido a Philips. Para sacar el mayor partido de la asistencia
Register your product and get support at.
 Register your product and get support at www.philips.com/welcome ENGLISH Introduction Congratulations on your purchase and welcome to Philips! To fully benefit from the support that Philips offers, register
tr 2 el 14 da 26 no 35 sv 45 i 54 hu 64 bg 74 ar 96
 tr 2 el 14 da 26 no 35 sv 45 i 54 hu 64 bg 74 ar 96 de tr Emniyetle ilgili açıklamalar Kullanma kılavuzunu lütfen dikkatlice okuyun, kılavuza göre hareket edin ve kılavuzu başvuru kaynağı olarak saklayın!
CAMILLA. Izgara & Tost Makinesi Grill & Sandwich Maker. Instruction Manual Kullan m K lavuzu
 CAMILLA Izgara & Tost Makinesi Grill & Sandwich Maker Instruction Manual Kullan m K lavuzu Girifl Uzun y llar sorunsuz çal flmas için tasarlanan ve üretilen Fakir Camilla Izgara ve Tost Makinesini sat
EC 314 Mutfak Baskülü Kitchen Scale
 Model No: EC 314 Mutfak Baskülü / Kitchen Scale Kullanma Kılavuzu / Instruction Manual EC 314 Mutfak Baskülü Kitchen Scale For the purpose of using and maintaining the kitchen scale, please read this instruction
GENİŞLEYEN GÜVENLİK KAPISI EXPANDING SAFETY GATE
 GENİŞLEYEN GÜVENLİK KAPISI EXPANDING SAFETY GATE www.odabu.com.tr UYARI MONTAJ VE KULLANIM ÖNCESİ KILAVUZ İÇİNDEKİ TÜM TALİMATLARI OKUYUNUZ KILAVUZU İHTİYAÇ DURUMUNDA KULLANMAK ÜZERE SAKLAYINIZ Güvenlik
TK siemens-home.com/welcome. Register your product online. tr el da no fi sv hu bg ar
 TK 53... siemens-home.com/welcome tr el da no fi sv hu bg ar Kullanım kılavuzu Οδηγίες χρήσης Brugsanvisning Bruksanvisning Käyttöohje Bruksanvisning Használati utasítás Указания за употреба إرشادات االستخدام
Toaster User Manual Ekmek Kızartma Makinesi Kullanma Kılavuzu BKK 3070 EK
 Toaster User Manual Ekmek Kızartma Makinesi Kullanma Kılavuzu BKK 3070 EK Please read this user manual first! Dear Customer, Thank you for prefering a Beko product. We hope that you get the best results
Satinelle Massage HP6463, HP6462, HP HP6463 HP6463 HP6462
 Satinelle Massage HP6463, HP6462, HP6461 HP6463 HP6463 HP6462 2 1 0 2 3 4 5 6 7 8 9 10 11 12 13 14 15 16 17 18 www.philips.com ENGLISH Introduction. With your new Satinelle Massage you can remove unwanted
Manual de Instrucciones Manual de Instruções Kullanma Kılavuzu
 Manual de Instrucciones Manual de Instruções Kullanma Kılavuzu ES PT TR MWL 20 BI Cód.: 1831226 ES Estimado Cliente: Antes de continuar, queremos agradecerle su preferencia por nuestro producto. Estamos
EZB3410AOX PT FORNO MANUAL DE INSTRUÇÕES 2 TR FIRIN KULLANMA KILAVUZU 24
 EZB3410AOX PT FORNO MANUAL DE INSTRUÇÕES 2 TR FIRIN KULLANMA KILAVUZU 24 2 ÍNDICE 1. INFORMAÇÕES DE SEGURANÇA... 3 2. INSTRUÇÕES DE SEGURANÇA...4 3. DESCRIÇÃO DO PRODUTO...6 4. ANTES DA PRIMEIRA UTILIZAÇÃO...
PCL 10. Robert Bosch GmbH Power Tools Division 70745 Leinfelden-Echterdingen Germany. www.bosch-pt.com 1 609 92A 0J3 (2013.
 OBJ_BUCH-693-004.book Page 1 Friday, December 13, 2013 12:33 PM WEU WEU Off On Robert Bosch GmbH Power Tools Division 70745 Leinfelden-Echterdingen Germany PCL 10 1 609 92A 0J3 (2013.12) T / 46 WEU de
İş E-Posta. E-Posta - Giriş. Αξιότιμε κύριε Πρόεδρε, Son derece resmi, alıcının ismi yerine kullanılabilecek bir ünvanı var ise
 - Giriş Türkçe Yunanca Sayın Başkan, Αξιότιμε κύριε Πρόεδρε, Son derece resmi, alıcının ismi yerine kullanılabilecek bir ünvanı var ise Sayın yetkili, Resmi, erkek alıcı, bilinmeyen isim Sayın yetkili,
gerek- + zaman eki mecburiyetinde + kişi eki
 TÜRKÇE II A - Ders 12-13 LAZIM / GEREK vs ile GEREKLİLİK BELİRTME 1.1. eylem + ma + iyelik eki gerek / lâzım 1.2. eylem + mak gerek / lâzım gerek- + zaman eki zorunda + kişi eki gerek- + zaman eki mecburiyetinde
istruzioni per l'uso Instrucciones de uso Tagliacapelli elettrica Cortador de pelo batería / red eléctrica Saç kesme makinası
 istruzioni per l'uso Instrucciones de uso KULLANMA KILAVUZU Tagliacapelli Batteria / Alimentazione elettrica Cortador de pelo batería / red eléctrica Saç kesme makinası Akü / Elektrik şebekesi CRR ICE-21
HQ6990, HQ6970, HQ6950, HQ6920 CHARGE
 HQ6990, HQ6970, HQ6950, HQ690 3 4 5 6 7 CHARGE 8 9 0 3 4 5 6 7 8 9 0 Español Introducción Enhorabuena por la compra de este producto y bienvenido a Philips. Para sacar el mayor partido de la asistencia
Teknoloji Servisleri; (Technology Services)
") Antalya International University Teknoloji Servisleri; (Technology Services) Microsoft Ofis Yazılımları (Microsoft Office Software), How to Update Office 365 User Details How to forward email in Office
Antalya International University Teknoloji Servisleri; (Technology Services) Microsoft Ofis Yazılımları (Microsoft Office Software), How to Update Office 365 User Details How to forward email in Office
1800 W TOSTÇU GRANITE TOSTÇU LUX GRANITE KULLANMA KILAVUZU INSTRUCTION MANUAL GEBRAUCHSANWEISUNG AR 291 AR 292
 TOSTÇU GRANITE TOSTÇU LUX GRANITE AR 291 / AR 292 IZGARA VE TOST MAKİNESİ AR 291 / AR 292 GRILL AND SANDWICH MAKER AR 291 / AR 292 GRILL-UND SANDWICHMAKER (TOASTER) KULLANMA KILAVUZU INSTRUCTION MANUAL
1800 W PANİNİ GRANIT MÜRDÜM PTFE KULLANMA KILAVUZU INSTRUCTION MANUAL GEBRAUCHSANWEISUNG PLAKALAR Ç I K A R I L A B İ L İ R P L A K A L A R
 ESİ PANİNİ GRANITE MÜRDÜM AR 2021 IZGARA VE TOST MAKİNESİ AR 2021 GRILL AND SANDWICH MAKER AR 2021 GRILL UND SANDWICHMAKER (TOASTER) KULLANMA KILAVUZU INSTRUCTION MANUAL GEBRAUCHSANWEISUNG 1800 W 4 ADET
K 476 Samba Meyve Sıkacağı Smoothie Maker
 Model No: K 476 SAMBA Meyve Sıkacağı Smoothie Maker Kullanma Kılavuzu / Instruction Manual K 476 Samba Meyve Sıkacağı Smoothie Maker MAIN PARTS 3 Safety-button 1 Motor Unit Blending jar 2 1. Motor Unit
CNC MACH breakout board user manual V8 type
 CNC MACH breakout board user manual V8 type 1 Catalogue CNC Router breakout board V8 type user manual... Hata! Yer işareti tanımlanmamış. 1) Brief introduction:...3 2) Breakout board drawing:...4 3) Wiring:...5
Clear omegle ban on puffin
 Clear omegle ban on puffin How to Get Unbanned from Omegle. Omegle can be a rowdy place, but bans can come when you least expect them. If you don't have the patience to wait out. You can use Unban Omee
IDENTITY MANAGEMENT FOR EXTERNAL USERS
 1/11 Sürüm Numarası Değişiklik Tarihi Değişikliği Yapan Erman Ulusoy Açıklama İlk Sürüm IDENTITY MANAGEMENT FOR EXTERNAL USERS You can connect EXTERNAL Identity Management System (IDM) with https://selfservice.tai.com.tr/
İthalatçı / Üretici Firma: BSH Ev Aletleri Sanayi ve Ticaret A.Ş., Fatih Sultan Mehmet Mahallesi, Balkan Caddesi No: 51, Ümraniye, İstanbul,
 İthalatçı / Üretici Firma: BSH Ev Aletleri Sanayi ve Ticaret A.Ş., Fatih Sultan Mehmet Mahallesi, Balkan Caddesi No: 51, 34771 Ümraniye, İstanbul, TURKEY T: 216 528 90 00 F: 216 528 99 99 E: info@profilo.com.tr
700 W WAFFY KULLANMA KILAVUZU INSTRUCTION MANUAL GEBRAUCHSANWEISUNG PASLANMAZ ÇELİK W A F F L E P L A K A L A R
 WAFFY AR 296 WAFFLE MAKİNESİ AR 296 WAFFLE MAKER AR 296 WAFFEL MASCHINE KULLANMA KILAVUZU INSTRUCTION MANUAL GEBRAUCHSANWEISUNG 700 W YAPIŞMAZ PASLANMAZ ÇELİK W A F F L E P L A K A L A R EN WAFFY AR 296
NANCY. Kullanım Kılavuzu Ekmek Kızartma Makinesi. Instruction Manual Toaster
 NANCY TR GB Kullanım Kılavuzu Ekmek Kızartma Makinesi Instruction Manual Toaster TR İÇİNDEKİLER Genel... 3 Kullanma talimatları hakkında bilgi... 3 Sorumluluk... 3 Kullanma talimatları hakkında uyarılar...
istruzioni per l'uso Instrucciones de uso CRR move-12 /// Art.: 9221072
 istruzioni per l'uso Instrucciones de uso KULLANMA KILAVUZU CRR move-12 /// Art.: 9221072 Stand: 08.2013 /// PO 100049 CRR move-12 /// Art.: 9221072 Italiano 06 Español 22 Türkçe 38 Questo non è un indirizzo
HP6512 B M 8 9 10 E L F J 11 12 13 H 14 15 16
 1 2 3 4 A N HP6512 B M 5 6 7 C D 8 9 10 E L F K G J 11 12 13 I H 14 15 16 17 18 19 20 21 22 23 24 25 26 27 28 29 30 31 32 EsPAñOL Introducción Enhorabuena por la compra de este producto y bienvenido a
X9201. www.blackanddecker.com
 X9201 www.blackanddecker.com English 3 Italiano 7 Español 13 EÏÏËÓÈÎ 18 Türkçe 23 Copyright Black & Decker 2 ENGLISH IRON X920 2 3 4 5 6 7 8 9 11 12 MAX 15 1 14 10 13 Thank you for choosing Black & Decker.
SK 2385B SU ISITICI (KETTLE)
") SK 2385B SU ISITICI (KETTLE) ES De erli Müflterimiz, Ürün seçiminde S NBO'yu tercih etti iniz için teflekkür ederiz. Uzun ve verimli bir kullan m için cihaz kullanmadan önce bu k lavuzu özellikle güvenlik
SK 2385B SU ISITICI (KETTLE) ES De erli Müflterimiz, Ürün seçiminde S NBO'yu tercih etti iniz için teflekkür ederiz. Uzun ve verimli bir kullan m için cihaz kullanmadan önce bu k lavuzu özellikle güvenlik
1800 W TOSTÇU DELUX PAPATYA PTFE KULLANMA KILAVUZU INSTRUCTION MANUAL GEBRAUCHSANWEISUNG PLAKALAR DÖKÜM Ç I K A R I L A B İ L İ R P L A K A L A R
 ESİ TOSTÇU DELUX PAPATYA AR 2020 IZGARA VE TOST MAKİNESİ AR 2020 GRILL AND SANDWICH MAKER AR 2020 GRILL UND SANDWICHMAKER (TOASTER) KULLANMA KILAVUZU INSTRUCTION MANUAL GEBRAUCHSANWEISUNG 1800 W 6 ADET
Choreography Notes for: Usta-Çırak 2014 Schadia, all rights reserved
 5 4 Usta-Çırak Usta sen ol bu sefer çırağın ben. Yaklaşa yaklaşa mesafe kalmadı. Dünden hazırız ama cesaret olmalı Sen bana aşık ben sana aşık Ne duruyoruz ki başlasak artık? Seni çözmek için alt yazı
istruzioni per l'uso Instrucciones de uso CRR match-15 /// Art.: 9133302
 istruzioni per l'uso Instrucciones de uso KULLANMA KILAVUZU CRR match-15 /// Art.: 9133302 Stand: 07.2013 /// PO 100048 CRR match-15 /// Art.: 9133302 Italiano 06 Español 26 Türkçe 46 Questo non è l'indirizzo
AVE. Instruction Manual Kullan m K lavuzu. Toaster. Ekmek kızartma Makinesi
 AVE Ekmek kızartma Makinesi Toaster Instruction Manual Kullan m K lavuzu G R fi Uzun y llar sorunsuz çal flmas için tasarlanan ve üretilen Fakir Ave Ekmek K zartma Makinesini sat n ald n z için teflekkür
SK 2385B SU ISITICI (KETTLE)
") SK 2385B SU ISITICI (KETTLE) IT De erli Müflterimiz, Ürün seçiminde S NBO'yu tercih etti iniz için teflekkür ederiz. Uzun ve verimli bir kullan m için cihaz kullanmadan önce bu k lavuzu özellikle güvenlik
SK 2385B SU ISITICI (KETTLE) IT De erli Müflterimiz, Ürün seçiminde S NBO'yu tercih etti iniz için teflekkür ederiz. Uzun ve verimli bir kullan m için cihaz kullanmadan önce bu k lavuzu özellikle güvenlik
1150 W TRIPPER KULLANMA KILAVUZU INSTRUCTION MANUAL GEBRAUCHSANWEISUNG T U T M A S A P I
 TRIPPER AR 690 SEYAHAT ÜTÜSÜ AR 690 TRAVEL IRON AR 690 REİSE BÜGELEİSEN KULLANMA KILAVUZU INSTRUCTION MANUAL GEBRAUCHSANWEISUNG 1150 W KATLANABİLİR T U T M A S A P I SEYAHATLER İÇİN EN 1- Ceramıc coated
HD7479, HD7470 HD7459 HD7470 HD7479 HD7470 HD7459 HD7470 HD7479 HD7459. >75% recycled paper 4 MIN Koninklijke Philips Electronics N.V.
 HD770 HD75 HD77 HD77, HD770 HD75 5 HD77 HD770 HD75 HD770 HD75 HD77 5 7 0 Koninklijke Philips Electronics N.V. >75% recycled paper All rights reserved. 000.0.7. (0/0) sec. 5 HD770 HD75 HD77 5 5 HD770 HD75
Hızlı Başlangıç Kılavuzu Γρήγορος Οδηγός Χρήσης Краткое руководство по эксплуатации Gyors útmutató Instrukcja obsługi HL-890
 Hızlı Başlangıç Kılavuzu Γρήγορος Οδηγός Χρήσης Краткое руководство по эксплуатации Gyors útmutató Instrukcja obsługi HL-890 HL-890 1 2 3 4 5 6 7 8 9 10 11 12 13 14 15 16 17 18 1 Kontrol Paneli 2 Fırın
Aria Buharlı Ütü Steam Iron
 Model No: P 740 Aria Buharlı Ütü/Steam Iron Kullanma Kılavuzu / Instruction Manual P 740 Aria Buharlı Ütü Steam Iron PARTS DIRECTORY A. Water tank B. Temperature control dial C. Power cord protector D.
700 W WAFİTO W A F F L E P L A K A L A R KULLANMA KILAVUZU INSTRUCTION MANUAL GEBRAUCHSANWEISUNG
 W A F F L E P L A K A L A R I WAFİTO AR 295 TOST VE WAFFLE MAKİNESİ AR 295 SANDWICH AND WAFFLE AR 295 WAFFEL- und TOASTMASCHINE KULLANMA KILAVUZU INSTRUCTION MANUAL GEBRAUCHSANWEISUNG 700 W 2 ADET TOST
PopCorn K 313. Kullanma Kılavuzu / Instruction Manual. Mısır Patlatma Makinesi Popcorn Maker. Mısır Patlatma Makinesi.
 Model No: K 313 PopCorn Mısır Patlatma Makinesi Popcorn Maker Kullanma Kılavuzu / Instruction Manual K 313 PopCorn Mısır Patlatma Makinesi Popcorn Maker Meaning of the Symbols in These Instructions All
istruzioni per l'uso Instrucciones de uso CRR GENTLE-24 /// Art.:
 istruzioni per l'uso Instrucciones de uso KULLANMA KILAVUZU CRR GENTLE-24 /// Art.: 9154071 Stand: 03.2014 /// PO 100094 CRR GENTLE-24 /// Art.: 9154071 Italiano 05 Español 21 Türkçe 37 Set 3 in 1 trimmer
KULLANMA KLAVUZU / USER'S GUIDE GTİP/HS Code:
 MOTORLU ÇOKLU ASTAR KESME MAKİNESİ MOTOR DRIVEN LINING CUTTING MACHINE KULLANMA KLAVUZU / USER'S GUIDE GTİP/HS Code: 8461.90.00.00.00 Çelik Kuyumculuk Kalıp Makine San. Ve Tic. Ltd. Şti. Adres: Atatürk
Ardunio ve Bluetooth ile RC araba kontrolü
 Ardunio ve Bluetooth ile RC araba kontrolü Gerekli Malzemeler: 1) Arduino (herhangi bir model); bizim kullandığımız : Arduino/Geniuno uno 2) Bluetooth modül (herhangi biri); bizim kullandığımız: Hc-05
EGG9363NOX... IT PIANO COTTURA ISTRUZIONI PER L USO 2 ES PLACA DE COCCIÓN MANUAL DE INSTRUCCIONES TR OCAK KULLANMA KILAVUZU 31
 EGG9363NOX...... IT PIANO COTTURA ISTRUZIONI PER L USO 2 ES PLACA DE COCCIÓN MANUAL DE INSTRUCCIONES 17 TR OCAK KULLANMA KILAVUZU 31 2 www.electrolux.com INDICE 1. INFORMAZIONI PER LA SICUREZZA.........................................
istruzioni per l'uso Instrucciones de uso CRR ICE-213 /// Art.: 9113080
 istruzioni per l'uso Instrucciones de uso KULLANMA KILAVUZU CRR ICE-213 /// Art.: 9113080 Stand: 07.2014 /// PO 100072 CRR ICE-213 /// Art.: 9113080 Italiano 05 Español 27 Türkçe 49 Questo non è l'indirizzo
Comece aqui Bem-vindo, este é o seu Guia de configuração rápida. Buradan başlayın Merhaba, bu belge Hızlı Kurulum Kılavuzunuzdur
 Multi Channel AV Receiver S-DN840 PT Comece aqui Bem-vindo, este é o seu Guia de configuração rápida Buradan başlayın Merhaba, bu belge Hızlı Kurulum Kılavuzunuzdur 1 PT Configurar os altifalantes Hoparlörlerin
NONA AR IN 1 DİKEY ELEKTRİKLİ SÜPÜRGE AR IN 1 UPRIGHT VACUUM CLEANER KULLANMA KILAVUZU INSTRUCTION MANUAL 1200 W Ü Ç G E N B A Ş L I K
 NONA AR 4016 2 IN 1 DİKEY ELEKTRİKLİ SÜPÜRGE AR 4016 2 IN 1 UPRIGHT VACUUM CLEANER KULLANMA KILAVUZU INSTRUCTION MANUAL 1200 W Ü Ç G E N B A Ş L I K EN NONA AR 4016 2 in 1 UPRIGHT VACUUM CLEANER 1- Main
HR1335. User manual
 1 HR1335 User manual 4203.064.6114.1 ENGLISH Introduction Congratulations on your purchase and welcome to Philips! To fully benefit from the support that Philips offers, register your product at www.philips.com/welcome.
PRANDE. Instruction Manual Kullan m K lavuzu. Toaster. Ekmek kızartma Makinesi
 PRANDE Ekmek kızartma Makinesi Toaster Instruction Manual Kullan m K lavuzu 2 G R fi Uzun y llar sorunsuz çal flmas için tasarlanan ve üretilen Fakir Prande Ekmek K zartma Makinesini sat n ald n z için
a, ı ı o, u u e, i i ö, ü ü
 Possessive Endings In English, the possession of an object is described by adding an s at the end of the possessor word separated by an apostrophe. If we are talking about a pen belonging to Hakan we would
Children being supervised not to play with the appliance.
 SSI 2868 ÜTÜ ES - 1 - Children being supervised not to play with the appliance. This appliance is not intended for use by persons (including children) with reduced physical,sensory or mental capabilities,
G R fi De erli Müflterimiz, Ürün seçiminde S NBO'yu tercih etti iniz için teflekkür ederiz. Uzun ve verimli bir kullan m için cihaz kullanmadan önce b
 SBG 7102 IZGARA KULLANMA KILAVUZU TR EN ES www.sinbo.com.tr AR G R fi De erli Müflterimiz, Ürün seçiminde S NBO'yu tercih etti iniz için teflekkür ederiz. Uzun ve verimli bir kullan m için cihaz kullanmadan
CLARO AR 688 SERAMİK TABANLI ÜTÜ AR 688 CERAMIC SOLEPLATE IRON KULLANMA KILAVUZU INSTRUCTION MANUAL 2400 W
 CLARO AR 688 SERAMİK TABANLI ÜTÜ AR 688 CERAMIC SOLEPLATE IRON KULLANMA KILAVUZU INSTRUCTION MANUAL 2400 W EN CLARO AR 688 CERAMIC SOLEPLATE IRON We thank you for having selected the Arzum brand iron.
GSN.. es Instrucciones de uso pt Instruções de serviço. el Οδηγίες χρήσης tr Kullanma kılavuzu
 GSN.. es Instrucciones de uso pt Instruções de serviço el Οδηγίες χρήσης tr Kullanma kılavuzu es Índice Consejos y advertencias de seguridad... 4 Consejos para la eliminación del embalaje y el desguace
Istruzioni per l installazione e l uso
 Istruzioni per l installazione e l uso LAVABIANCHERIA Sommario IT IT Italiano,1 GR ΕΛΛΗΝΙΚΑ, 13 TR Türkçe,25 Installazione, 2-3 Disimballo e livellamento Collegamenti idraulici ed elettrici Dati tecnici
25 W BELISA KULLANMA KILAVUZU INSTRUCTION MANUAL GEBRAUCHSANWEISUNG S E R A Mİ K P L A K A L A R
 S E R A Mİ K P L A K A L A R BELISA AR 5025 SAÇ ŞEKİLLENDİRİCİ AR 5025 HAIR STYLER AR 5025 HAAR-STYLING KULLANMA KILAVUZU INSTRUCTION MANUAL GEBRAUCHSANWEISUNG 25 W KERATİN KATKILI 1- Main body BELISA
LISA AR 5028 XL SAÇ MAŞASI AR 5028 XL CURLING IRON AR 5028 XL LOCKENSTAB KULLANMA KILAVUZU INSTRUCTION MANUAL GEBRAUCHSANWEISUNG 52 W
 LISA AR 5028 XL SAÇ MAŞASI AR 5028 XL CURLING IRON AR 5028 XL LOCKENSTAB KULLANMA KILAVUZU INSTRUCTION MANUAL GEBRAUCHSANWEISUNG 52 W EN LISA AR 5028 XL CURLING IRON 1- Ceramic covered 32 mm curling iron
P 737 Marino Buharlı Ütü
 Model No: P 737 Marino Buharlı Ütü/Steam Iron Kullanma Kılavuzu / Instruction Manual P 737 Marino Buharlı Ütü PARÇALARI 1 - Taban 2 - Taban Kapağı 3 - Su püskürtme ucu 4 - Kulp 5 - Su doldurma yeri kapağı
1500 W PROSTICK 1500 WATT KULLANMA KILAVUZU INSTRUCTION MANUAL GEBRAUCHSANWEISUNG ML Ö L Ç Ü I K A B
 PROSTICK 1500 AR 1045 EL BLENDER AR 1045 HAND BLENDER AR 1045 HAND BLENDER KULLANMA KILAVUZU INSTRUCTION MANUAL GEBRAUCHSANWEISUNG 1500 W 1500 WATT 900 ML Ö L Ç Ü I K A B PROSTICK 1500 AR 1045 HAND BLENDER
Delta Pulse 3 Montaj ve Çalıstırma Kılavuzu. www.teknolojiekibi.com
 Delta Pulse 3 Montaj ve Çalıstırma Kılavuzu http:/// Bu kılavuz, montajı eksiksiz olarak yapılmış devrenin kontrolü ve çalıştırılması içindir. İçeriğinde montajı tamamlanmış devrede çalıştırma öncesinde
Café Prestige. Kahve Makinesi - Kullanma K lavuzu Coffee Maker - Instruction Manual
 Café Prestige Kahve Makinesi - Kullanma K lavuzu Coffee Maker - Instruction Manual 2 Kapak Su Seviyesi Göstergesi Açma/Kapama Dü mesi Plastik Kulp Cam Hazne G R fi Size uzun y llar güvenle hizmet verecek
2200 W HAIRSTIL PRO KULLANMA KILAVUZU INSTRUCTION MANUAL GEBRAUCHSANWEISUNG
 HAIRSTIL PRO AR 5009 PROFESYONEL SAÇ KURUTMA MAKİNESİ AR 5009 PROFESSIONAL HAIR DRYER AR 5009 PROFESSIONAL HAARTROCKNER KULLANMA KILAVUZU INSTRUCTION MANUAL GEBRAUCHSANWEISUNG 2200 W HAIRSTIL PRO AR 5009
D-Link DSL 500G için ayarları
 Celotex 4016 YAZILIM 80-8080-8081 İLDVR HARDWARE YAZILIM 80-4500-4600 DVR2000 25 FPS YAZILIM 5050-5555-1999-80 EX-3004 YAZILIM 5555 DVR 8008--9808 YAZILIM 80-9000-9001-9002 TE-203 VE TE-20316 SVDVR YAZILIM
Meira Mini Robot. Meira Mini Chopper Instruction Manual Meira Mini Robot Kullanma Kılavuzu
 Meira Mini Robot Meira Mini Chopper Instruction Manual Meira Mini Robot Kullanma Kılavuzu Girifl Uzun y llar sorunsuz çal flmas için tasarlanan ve üretilen Fakir Meira mini robotu sat n alm fl oldu unuz
PRİZ KOLYE Clamp Saddles
 PRİZ PR!Z KOLYE KOLYE C!VATALI!"#&'( (,' -%$.'/)!"#&'( (! *'01% "$'!.%3+1, /&%!.") #&4!.%)%,,((!"#&'( (,' -%$.'/) #&4!.%)%,,(( (!Ambalaj *'01% "$'!.%3+1, Adedi D x G /&%!.")!"#&'( 9111 x ½ 918 1 x ¾ 911
RF 11. Ya lı Radyatör Oil Filled Radiator. Instruction Manual Kullan m K lavuzu
 RF 11 Ya lı Radyatör Oil Filled Radiator Instruction Manual Kullan m K lavuzu Girifl Size uzun y llar güvenle hizmet verecek olan Fakir-RF11 Turbo ya l radyatörü sat n alm fl oldu unuz için sizi kutlar
800 W CEZVELİ KULLANMA KILAVUZU INSTRUCTION MANUAL GEBRAUCHSANWEISUNG
 CEZVELİ AR 3018 TÜRK KAHVESİ MAKİNESİ AR 3018 TURKISH COFFEE MAKER AR 3018 TÜRKISCHE KAFFEEMASCHIENE KULLANMA KILAVUZU INSTRUCTION MANUAL GEBRAUCHSANWEISUNG 800 W EN CEZVELİ AR 3018 TURKISH COFFEE MAKER
Do not open the exam until you are told that you may begin.
 ÖRNEKTİR ÖRNEKTİR ÖRNEKTİR ÖRNEKTİR ÖRNEKTİR OKAN ÜNİVERSİTESİ FEN EDEBİYAT FAKÜLTESİ MATEMATİK BÖLÜMÜ 03.11.2011 MAT 461 Fonksiyonel Analiz I Ara Sınav N. Course ADI SOYADI ÖĞRENCİ NO İMZA Do not open
Learn how to get started with Dropbox: Take your stuff anywhere. Send large files. Keep your files safe. Work on files together. Welcome to Dropbox!
 Learn how to get started with Dropbox: 1 2 3 4 Keep your files safe Take your stuff anywhere Send large files Work on files together Welcome to Dropbox! 1 Keep your files safe Dropbox lets you save photos,
G R fi De erli Müflterimiz, Ürün seçiminde S NBO'yu tercih etti iniz için teflekkür ederiz. Uzun ve verimli bir kullan m için cihaz kullanmadan önce b
 SBG 7102 IZGARA KULLANMA KILAVUZU TR 0850 811 65 65 www.sinbo.com EN ES AR G R fi De erli Müflterimiz, Ürün seçiminde S NBO'yu tercih etti iniz için teflekkür ederiz. Uzun ve verimli bir kullan m için
MİNİMAX AR 285 WAFFLE VE TOST MAKİNESİ
 MİNİMAX AR 285 WAFFLE VE TOST MAKİNESİ KULLANMA KILAVUZU TOST + WAFFLE 750 W 11 MİNİMAX AR 285 WAFFLE AND SANDWICH MAKER 1- Ergonomic handle 2- Temperature (ready) indicator light (green) 3- Energy (power/warm
1650 W ÇAYCI HEPTAZE KULLANMA KILAVUZU INSTRUCTION MANUAL GEBRAUCHSANWEISUNG PASLANMAZ ÇELİK K A P A K
 ÇAYCI HEPTAZE AR 3023 / AR 3024 / AR 3031 / AR 3032 / AR 3027 / AR 3040 ÇAY MAKİNESİ AR 3023 / AR 3024 / AR 3031 / AR 3032 / AR 3027 / AR 3040 TEA MACHINE AR 3023 / AR 3024 / AR 3031 / AR 3032 / AR 3027
MİXXİ COLOR AR 1047 MİKSER AR 1047 MIXER AR 1047 MIXER KULLANMA KILAVUZU INSTRUCTION MANUAL GEBRAUCHSANWEISUNG 700 W T U R B O F O N K Sİ Y O N
 MİXXİ COLOR AR 1047 MİKSER AR 1047 MIXER AR 1047 MIXER KULLANMA KILAVUZU INSTRUCTION MANUAL GEBRAUCHSANWEISUNG 700 W T U R B O F O N K Sİ Y O N MİXXİ COLOR AR 1047 MIXER We thank you for having selected
Europe / Middle-East / Africa Asia North / Central / South America Microlife BP A130
 Europe / Middle-East / Africa Microlife AG Espenstrasse 139 9443 Widnau / Switzerland Tel. +41 / 71 727 70 30 Fax +41 / 71 727 70 39 Email admin@microlife.ch www.microlife.com Asia Microlife Corporation.
1. A lot of; lots of; plenty of
 a lot of lots of a great deal of plenty of çok, bir çok many much çok, bir çok a little little az, biraz a few few az, birkaç 1. A lot of; lots of; plenty of a lot of ( en yaygın olanıdır ), lots of, plenty
P 226 Velox Elektrikli Süpürge Vacuum Cleaner
 Model No: P 226 Velox Elektrikli Süpürge Vacuum Cleaner Kullanma Kılavuzu / Instruction Manual P 226 Velox Elektrikli Süpürge Vacuum Cleaner SAFETY DIRECTION 1. For the first operation, it is advisable
manual de instrucciones kullanma kılavuzu
 manual de instrucciones kullanma kılavuzu Lavavajillas Bulaşık Makinesi ESI 68060 2 electrolux Índice de materias Electrolux. Thinking of you. Conozca mejor nuestros conceptos en www.electrolux.com Información
P 225 Power Force Elektrikli Süpürge Vacuum Cleaner
 Model No: P 225 Power Force Elektrikli Süpürge Vacuum Cleaner Kullanma Kılavuzu / Instruction Manual P 225 Power Force Elektrikli Süpürge Vacuum Cleaner MAIN PARTS 1 Brush tool 2 Extending metal tube 3
AQUARIUM ACCESSORIES
 AQUARIUM ACCESSORIES İçindekiler - Contents 01 AKILLI İÇ FİLTRE / SMART INTERNAL FILTER 11 İÇ FİLTRE 1400 T / INTERNAL FILTER 1400 T 03 İÇ FİLTRE 600 F / INTERNAL FILTER 600 F 12 İÇ FİLTRE 1800 T / INTERNAL
English 5. Italiano 10. Español 16 EÏÏËÓÈÎ 22. Türkçe 28. Copyright Black & Decker
 TO670 TO770 1 English 5 Italiano 10 Español 16 EÏÏËÓÈÎ 22 Türkçe 28 Copyright Black & Decker 2 7 4 6 3 5 5 1 2 A 3 12 13 10 9 8 11 B C 16 15 15 16 14 17 18 19 D E 4 ENGLISH TO670 TOASTER OVEN TO770 CONVECTION-ROTISSERIE
1650 W ÇAYCI KLASİK KULLANMA KILAVUZU INSTRUCTION MANUAL GEBRAUCHSANWEISUNG PASLANMAZ ÇELİK K A P A K
 ÇAYCI KLASİK AR 3006 ÇAY MAKİNESİ AR 3006 TEA MAKER AR 3006 ELEKTRISCHE TEEKANNE KULLANMA KILAVUZU INSTRUCTION MANUAL GEBRAUCHSANWEISUNG 1650 W PASLANMAZ ÇELİK PASLANMAZ ÇELİK İ Ç A Y F İ LT R E S ÇİFT
... PT FRIGORÍFICO MANUAL DE INSTRUÇÕES 2 ERX3214AOX INSTRUCCIONES TR SOĞUTUCU KULLANMA KILAVUZU 36
 ERX3214AOX...... PT FRIGORÍFICO MANUAL DE INSTRUÇÕES 2 ES FRIGORÍFICO MANUAL DE INSTRUCCIONES 19 TR SOĞUTUCU KULLANMA KILAVUZU 36 2 www.electrolux.com ÍNDICE 1. INSTRUÇÕES DE SEGURANÇA.............................................
2000 W FLORA KULLANMA KILAVUZU INSTRUCTION MANUAL GEBRAUCHSANWEISUNG
 FLORA AR 3012 GİZLİ REZİSTANSLI SU ISITICI AR3012 KETTLE WITH CONCEALED RESISTANCE AR 3012 WASSERKOCHER MIT UNSICHTBAREM HEIZELEMENT KULLANMA KILAVUZU INSTRUCTION MANUAL GEBRAUCHSANWEISUNG 2000 W FLORA
Mr. Adam Smith Smith's Plastics 8 Crossfield Road Selly Oak Birmingham West Midlands B29 1WQ
 - Adres Bay J. Rhodes Rhodes & Rhodes A.Ş. 212 Silverback Drive Kaliforniya Springs CA 92926 Amerikan adres formatı: sokak numarası+sokak ismi ilçe ismi+il kısaltması+posta kodu Sayın Adam Smith Smith's
a) Present Continuous Tense (Future anlamda) I am visiting my aunt tomorrow. (Yarin halamı ziyaret ediyorum-edeceğim.)
 Present Continuous Tense (Future anlamda) I am visiting my aunt tomorrow. (Yarin halamı ziyaret ediyorum-edeceğim.)") a) Present Continuous Tense (Future anlamda) I am visiting my aunt tomorrow. (Yarin halamı ziyaret ediyorum-edeceğim.) He is having an exam on Wednesday. (Çarşamba günü sınav oluyor-olacak.) Mary is spending
a) Present Continuous Tense (Future anlamda) I am visiting my aunt tomorrow. (Yarin halamı ziyaret ediyorum-edeceğim.) He is having an exam on Wednesday. (Çarşamba günü sınav oluyor-olacak.) Mary is spending
GRACE. Kullanım Kılavuzu Izgara & Tost Makinesi. Instruction Manual Grill & Sandwich Maker
 GRACE TR GB Kullanım Kılavuzu Izgara & Tost Makinesi Instruction Manual Grill & Sandwich Maker TR İÇİNDEKİLER Genel...3 Kullanma Talimatları Hakkında Bilgi...3 Sorumluluk...3 Kullanma Talimatları Hakkında
Thunderbird Saç Kurutma Makinesi
 Model No: K 054 Thunderbird Saç Kurutma Makinesi / Hair Dryer Kullanma Kılavuzu / Instruction Manual K 054 Thunderbird Saç Kurutma Makinesi MAIN PARTS 1 3 4 2 5 6 7 1. Brush 2. Brush Rotary on/off switch
K 5018 Hanımeli Elektrikli Pişirici Pizza Pan
 Model No: K 5018 Hanımeli Elektrikli Pişirici Pizza Pan Kullanma Kılavuzu / Instruction Manual K 5018 Hanımeli Elektrikli Pişirici Pizza Pan MAIN PARTS 1 3 4 2 6 5 7 9 8 1. Glass lid 2. Handles 3. Cooking
Seyahat Etrafı Dolaşma
 - Yer Kayboldum. Nerede olduğunu bilmeme Onun haritada nerede olduğunu bana gösterir misiniz? Haritada belli bir sorma ı nerede bulurum? Belli bir hakkında sorma Eu estou perdido (a). Você pode me mostrar
GRACE. Izgara & Tost Makinesi Grill & Sandwich Maker. Kullanım Kılavuzu Instruction Manual
 GRACE Izgara & Tost Makinesi Grill & Sandwich Maker Kullanım Kılavuzu Instruction Manual Giriş Uzun yıllar sorunsuz çalışması için tasarlanan ve üretilen Fakir Grace Izgara ve Tost Makinesi ni satın aldığınız
PROSTICK 1000 AR 1016 ÇUBUK BLENDER SETİ AR 1016 HAND BLENDER SET AR 1016 STABMIXER-SET KULLANMA KILAVUZU INSTRUCTION MANUAL GEBRAUCHSANWEISUNG 1000 W
 PROSTICK 1000 AR 1016 ÇUBUK BLENDER SETİ AR 1016 HAND BLENDER SET AR 1016 STABMIXER-SET KULLANMA KILAVUZU INSTRUCTION MANUAL GEBRAUCHSANWEISUNG 1000 W EN PROSTICK 1000 AR 1016 HAND BLENDER SET 1- Motor